Even though the weather has returned to something more normal, despite the rain, it's still pretty nice here in WI. But, as promised, something did fall out of the craft room this evening. There was one, half finished valentine idea up there that finally got finished. I loved those little birds with their conversation hearts, the tilt of their heads and their expressions are great. They are one from a set by Inkadinkado (Animal Hearts 99646). There's a Bear Hug in this set too, that I'm really liking.
For the Spring card, I saw something like this on Pinterest and thought I'd translate it to a card. I'm not all that smooth with my sewing machine, so I drew the line first with a pencil. That made it pretty easy. Stop the needle in the lower position, slide the flower up to it and start up again. Repeat. The stamp is from Imaginisce, part of the Twitterpated collection (Item # 001112). I was trying to be 'Clean and Simple' or CAS with this one. I'm pretty sure this is as simple as I get. Barb Housner tried to get me to post one of these on Operation Write Home's FB page a good while back. Better late than never? And, just for Andrea, who believes green flowers are 'just wrong', there's one in there just for her! Happy Spring everyone! - AMK
Sunday, March 25, 2012
Wednesday, March 21, 2012
It's TOO Nice Outside!
Hello Everyone! Sorry to have left you hanging out here with only Valentine's to keep you company. It's been waaaaay to nice outside here in WI. I can't bring myself to while away the hours in my craft room when it's sunny and 80+ degrees in MARCH! We are setting records every day!
They say it's supposed to start raining tomorrow, so maybe something will fall out of the craft room this weekend. I do have to get started on the 2012 cookie books soon....hmmmm
Enjoy! - AMK
They say it's supposed to start raining tomorrow, so maybe something will fall out of the craft room this weekend. I do have to get started on the 2012 cookie books soon....hmmmm
Enjoy! - AMK
Monday, February 27, 2012
Valentines Part 2
Much like I did for Christmas, I kept on with the Valentine's to stock up for next year. Here are a few more that made it from pile to produced. I love this little kewpie doll. He usually makes an appearance every year in some way or another. I've used him for Mother's Day and I've got an idea for Christmas too.
This is the end result of the stamp positioner and masking class posts I did a few weeks back. As I mentioned in the class, the signpost is from Unity Stamps. I used some elastic string to accent the bottom. I was going for an arrow-ish look.
The town image in this one is also Unity Stamps, but I confess I paired it with another sentiment I had on the same theme. I do that a lot. Mix and match from my collection. It probably gives the manufacturers fits, but a girl has to do what those vioces in her head tell her is right.
Well - looky there! Another Unity Stamp valentine. I really loved those birch trees with their hearts sort of woven into the bark. I layed the ink on thick and then smeared it up a bit because bark isn't smooth, right? And, that little bird they sort of hid in the image was too cute not to color and bring forward with a hand cut matching paper feather. That little blue bird makes me happy!
This is the end result of the stamp positioner and masking class posts I did a few weeks back. As I mentioned in the class, the signpost is from Unity Stamps. I used some elastic string to accent the bottom. I was going for an arrow-ish look.
Well - looky there! Another Unity Stamp valentine. I really loved those birch trees with their hearts sort of woven into the bark. I layed the ink on thick and then smeared it up a bit because bark isn't smooth, right? And, that little bird they sort of hid in the image was too cute not to color and bring forward with a hand cut matching paper feather. That little blue bird makes me happy!
Saturday, February 4, 2012
Variations on the theme...
Here are a couple more of those 3-ring circus valentines I mentioned in the previous post. This is not the K&CO background paper, but something else, I got from somewhere else...more from the stack of Valentine paper that mysteriously appeared. The unicycling juggler I think is from Making Memories. The laughing elephant is definitely from 100 Proof Press which, if you have not discovered yet, well, take stock of your mad money before you hit that link....
Enjoy! - AMK
Enjoy! - AMK
Thursday, February 2, 2012
Valentines - Part 1
I've been working away at this year's Valentines. I was surprised by the amount of valentine-themed paper I had in my collection. Seriously, I must have a 2" high stack. Where the heck did all that come from? In an attempt to put a dent in it, I've focused on using two packs from K&Co. pictured below. One is pretty traditional, the other, the one on top, has a "love is a 3-ring Circus" theme to it, which I thought was both original and completely accurate.
I've been adding paper to these packs from various sources as the mood hits me. The one below may be hard to find. I've had it for a while. It's from Creative Imaginations. I'm really only using the edge of the page. It goes well with the circus theme. The middle will probably wind up as the envelope.
Here's a shot of the rest of the stuff I used to make the card at the bottom. Those Graphic 45 stamps from Hampton art are the perfect foil for the circus valentine. K&Co. offered some adhesive borders to match all the papers in the pack. I couldn't resist.
The finished piece. I used Glossy Accents to add detail to the hearts in the banner. Enjoy!
I've been adding paper to these packs from various sources as the mood hits me. The one below may be hard to find. I've had it for a while. It's from Creative Imaginations. I'm really only using the edge of the page. It goes well with the circus theme. The middle will probably wind up as the envelope.
The finished piece. I used Glossy Accents to add detail to the hearts in the banner. Enjoy!
Sunday, January 29, 2012
Cards from Friends and Family
Between Christmas and my Birthday just past, I've got a nice display of hand made cards that others have made and sent my way. I bought two of those little wood display stands from 7 Gypsies and keep them filled with stuff that I like. I thought I'd share....
This first one is one of mine - I keep it on display because I like the stamped sentiment. I keep this stamp out on my worktable too. It's a little blurry. It says "Normal day, let me be aware of the treasure you are".
This next one is from Lynn Diebold. A very pretty Christmas card she sent me.
Andrea sent this for my birthday this year. That rosette is VERY popular these days. This one is hand made, and very pretty. I think this is the first birthday card from Andrea that DIDN'T have Fluffles the cat on it. I don't miss him...:oP
This one came from Jan Nolte, a fellow Cedarburg crafter. Looks like she was into crafty brown for Christmas too!
These next two are from my big sister, Bridget. She likes to do a lot of hand lettering and decorating. There is a name for the style of lettering she did on the Christmas card, but I don't remember what it is. Essentially, you draw the letter and than fill it in by repeating a pattern over and over until the letter is no longer 'hollow'. Each letter has a different pattern to it.
This pretty winter tree came from Cheryl Husmann. She's got her own blog which you can peruse by clicking her in my blog roll on the right. She's a scrapbooker with grandbabies so her blog has a lot of layouts you can use for inspiration.
This first one is one of mine - I keep it on display because I like the stamped sentiment. I keep this stamp out on my worktable too. It's a little blurry. It says "Normal day, let me be aware of the treasure you are".
This one came from Jan Nolte, a fellow Cedarburg crafter. Looks like she was into crafty brown for Christmas too!
These next two are from my big sister, Bridget. She likes to do a lot of hand lettering and decorating. There is a name for the style of lettering she did on the Christmas card, but I don't remember what it is. Essentially, you draw the letter and than fill it in by repeating a pattern over and over until the letter is no longer 'hollow'. Each letter has a different pattern to it.
This pretty winter tree came from Cheryl Husmann. She's got her own blog which you can peruse by clicking her in my blog roll on the right. She's a scrapbooker with grandbabies so her blog has a lot of layouts you can use for inspiration.
Wednesday, January 18, 2012
Masking
Here's another way your Stamp-a-ma-jig stamp positioner is useful. I often find I only want to use part of a stamp. Maybe one flower out of a whole bunch, or in this example, one word from a sentiment. Sure, I could just use my computer and print out the word I want for my card, but that won't add it to the same element as the image we stamped in the previous post.
For this example, I want my finished image to say "Valentine, you make me smile", so we need to figure out how to add the word 'valentine' to what we already have when we don't have quite the right stamp.
The way to do that is to use the masking technique. Here is picture of what you will need. Elipse tape, is nothing more than a roll of paper where the entire back has post-it note glue on it. So, you guessed it, post-it notes work great for making masks. The stamp I am going to hy-jack the word 'valentine' from is pictured below. I stamped it onto the pink scrap just so you could see it on paper.
Cut off a piece of Eclipse tape and stamp your image onto the paper side. Use a dye or chalk ink so it drys fast.
Next, get out your craft knife and trim away the part of the image you want to show on your finished piece. In this case I am removing 'valentine' from the stamped mask.
Set the mask asside and place the pastic sheet from the stamp positioner on your work surface. Line up the jig with the corner like we did in the last post. Stamp your sentiment onto the plastic sheet making sure you have it nice and snug into that corner.
Place the mask on your project so the missing word will show where you want it. You'll note that the Elipse paper is see-through. Post-it notes; not as much.
Layer the plastic sheet over the mask, matching up the letters, so it reads perfectly.
Add the jig, snug to the corner of the plastic sheet. Hold the jig in place with one hand and pull the plastic sheet away. You should now have the jig in place and the mask in place so...
...ink your stamp and snug it up to the jig in the corner. Lower the stamp onto your project and stamp.
Ok - that's it - go back to the top to see the finished image. You may see a little smudge above my finished image - I was toying with the word 'happy' while putting this class together and dropped the dirty stamp. Gah!
For this example, I want my finished image to say "Valentine, you make me smile", so we need to figure out how to add the word 'valentine' to what we already have when we don't have quite the right stamp.
The way to do that is to use the masking technique. Here is picture of what you will need. Elipse tape, is nothing more than a roll of paper where the entire back has post-it note glue on it. So, you guessed it, post-it notes work great for making masks. The stamp I am going to hy-jack the word 'valentine' from is pictured below. I stamped it onto the pink scrap just so you could see it on paper.
Next, get out your craft knife and trim away the part of the image you want to show on your finished piece. In this case I am removing 'valentine' from the stamped mask.
Set the mask asside and place the pastic sheet from the stamp positioner on your work surface. Line up the jig with the corner like we did in the last post. Stamp your sentiment onto the plastic sheet making sure you have it nice and snug into that corner.
Place the mask on your project so the missing word will show where you want it. You'll note that the Elipse paper is see-through. Post-it notes; not as much.
Add the jig, snug to the corner of the plastic sheet. Hold the jig in place with one hand and pull the plastic sheet away. You should now have the jig in place and the mask in place so...
...ink your stamp and snug it up to the jig in the corner. Lower the stamp onto your project and stamp.
Ok - that's it - go back to the top to see the finished image. You may see a little smudge above my finished image - I was toying with the word 'happy' while putting this class together and dropped the dirty stamp. Gah!
Tuesday, January 17, 2012
Stamp-a-ma-jig - Stamp Positioning
Hidey-Ho Readers - in an effort to stop stuffing my face after work in front of HBO, I put this class together on using a simple stamp positioner. It's called the Stamp-a-ma-jig and it retails for about $8. You can buy extra plastic sheets for the thing separately, but it comes with everything you need to get started. This is what you get, minus the tape runner. I stuck that in there so you could get an idea of how big the thing is. The plastic sheet has a sticker on the side you DON'T stamp on.
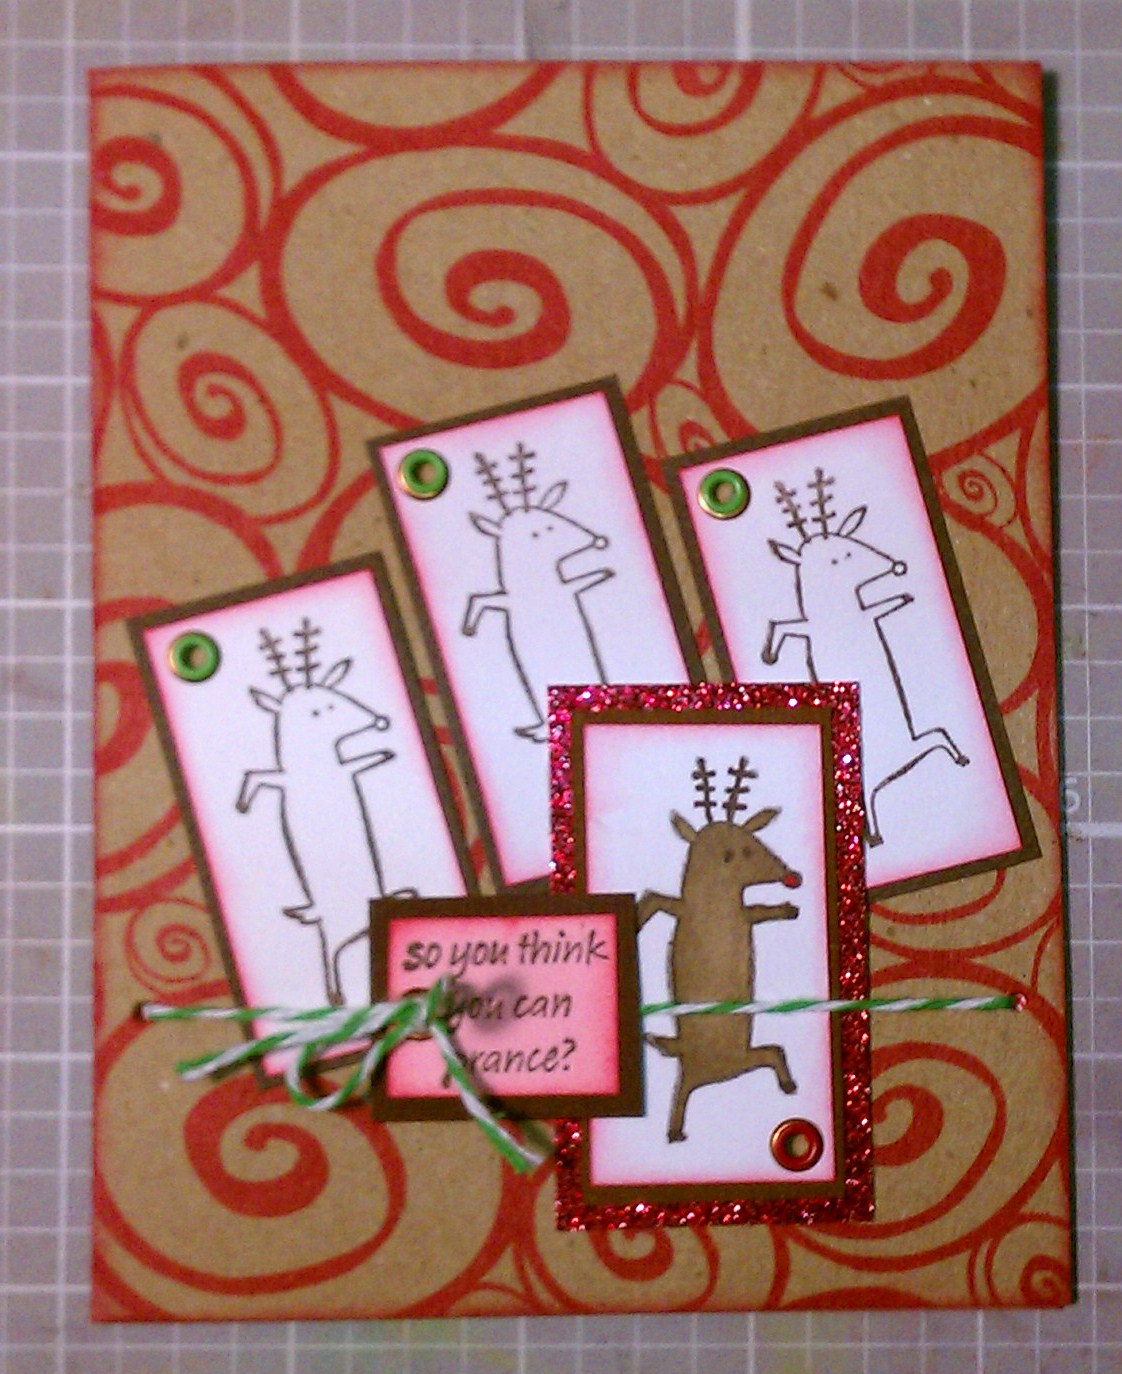
Ok - here is a look at the finished piece. I'm using a couple of stamps from one of Unity Stamp Co's sets and a sentiment from Hero Arts in the next post when we get to the masking class. The inks should be pigment ink. I'm using Colorbox; terracotta and pink.
First let's stamp the base image - the sign post. This is a larger stamp, and it's important not smear ink into the hole where we'll add the word 'smile'. To keep things even and clean, I like to use a brayer to load the stamp with ink. You can use your ink pad, but just be sure to keep the edges clean.
Not to get ahead of myself, but I doused the finished product in clear UTEE and melted it from behind with the heat gun. Another reason to use the brayer to load the stamp; it puts a nice, even, thick layer of ink on the page that UTEE loves to stick to. I find when using Ultra Thick Embossing Enamel (UTEE) it's best to heat the stuff from underneath. The larger particles tend to blow all over the place if heated from above.
Set the sign post image aside, once you have it stamped. Now, lay the plastic sheet on your work surface. The smooth side should be facing up. Place the jig handle tight to the corner of the plastic sheet. Ink your 'smile' stamp and carefully place the corner of the stamp into the 90 degree corner of the jig. Lower the stamp so it prints on the plastic sheet.
Ok - we're almost there...take the plastic sheet and layer it over the sign post so 'smile' is in the center of the lower oval.
Add the jig snug up against the corner of the plastic sheet, keeping 'smile' where you want it. Move the jig together with the plastic sheet until you get it just right.
Once you are happy with the placement, keeping the jig in place with one hand, carefully remove the plastic sheet with the other. Don't move your sign post image when you take away the plastic sheet. If you do, it's no big deal, just repeat the above step and try again. You should now have your stamped sign post image with the jig on your work surface. Ink your 'smile' stamp and place it in the corner of the jig, lowering it down to stamp onto the sign post.
Remove the stamp and the jig and you should now have 'smile' right where you want it. Ta da! (Here's where you can get out the UTEE and dunk, gently shake off the excess, and melt from behind.)
There are about a million different stamp positioners on the market today, but I find that none of them are as easy to use as this little gadget. Here are some additional tips if you are stuggling at all with this.
Not to get ahead of myself, but I doused the finished product in clear UTEE and melted it from behind with the heat gun. Another reason to use the brayer to load the stamp; it puts a nice, even, thick layer of ink on the page that UTEE loves to stick to. I find when using Ultra Thick Embossing Enamel (UTEE) it's best to heat the stuff from underneath. The larger particles tend to blow all over the place if heated from above.
Set the sign post image aside, once you have it stamped. Now, lay the plastic sheet on your work surface. The smooth side should be facing up. Place the jig handle tight to the corner of the plastic sheet. Ink your 'smile' stamp and carefully place the corner of the stamp into the 90 degree corner of the jig. Lower the stamp so it prints on the plastic sheet.
Once you are happy with the placement, keeping the jig in place with one hand, carefully remove the plastic sheet with the other. Don't move your sign post image when you take away the plastic sheet. If you do, it's no big deal, just repeat the above step and try again. You should now have your stamped sign post image with the jig on your work surface. Ink your 'smile' stamp and place it in the corner of the jig, lowering it down to stamp onto the sign post.
Remove the stamp and the jig and you should now have 'smile' right where you want it. Ta da! (Here's where you can get out the UTEE and dunk, gently shake off the excess, and melt from behind.)
- If you can't seem to pull the plastic sheet away without moving the base image, try using some repositionable tape to hold the base image to your work surface. You can stick it down with post-it notes too. They are designed for repositioning, but most people don't use them as tape. I do.
- Use pigment ink to start. It wipes right off the pastic sheet so you can try again. Chalk ink and Staz-On require you to remove it with special cleaners. It's just something else to mess up the place and keep you from getting things figured out while you practice.
- Ahhh...Practice. Yeah. Good idea!
- Note the plastic sheet has three corners (because of the sticker they place on it) that you can use for images. You can put a different image on each corner and place them anywhere you want them. If you buy extra plastic sheets, you get three in a pack. Thats 9 more corners to play with! Take off the silly sticker with some Un-Do and, bam! That's extra corners!
Monday, January 16, 2012
New Valentine Theme
If you've been visiting regularly, you've undoubtedly noticed I've been playing with the blog theme. It all started when my brother took down his blog site, one I had linked into my blog roll. He's a figure drawing sketch artist out in Portland who teaches drawing on the side. After he exited the on line world, I removed his link, saved everything and then those little wrench-crossed-with-screwdriver icons started showing up on all the widgets I have on my site. I've been messing with things ever since in an effort to get rid of them. They seem to have a mind of their own.
Since Valentine's day is right around the corner, and I've got all those piles of would be cards on the floor again, I'm sticking with a Valentine theme for a the next little while.
For those of you who were avid readers of 'The Paper Bicycle' my blog devoted to professional cycling, I've added a page to this blog. Right now it's linked under the Pages roll, but I may make it its own tab. I'm thinking I'll start those post updates on that new page. Google's blogger is SOoooo much easier to use than the wordpress blog I started that site with. With February being the official start of the 2012 season, I'll be just in time to start those, oh so wonderful rants as well.
- AMK
Thursday, January 12, 2012
Auntie Unusual
Guess who's finally gettin' her first year's baby book? Madison's big brother Jason got his shortly after he was born so it's only fitting that Little Red get hers. If you don't get why I call her Little Red, then you must not be from Wisconsin.
I don't do a lot of decorating on the inside of these baby books, because I figure Mom will add her presonal touches. Each page is an envelope that holds a different colored page. Pictures and little notes to baby are added each month for the first year. The book always starts with the birth month.
Beyond the obvious, these little books have a lot of uses, all of which work better if you keep the book a secret while they are growing up. For example:
- When she brings home the first boyfriend you don't like, you can whip this little thing out and embarass the hell out of her. Be sure to have at least one naked baby picture.
- Or, when she's become a screaming teenage nightmare, you can give this to her and she'll have no choice but to treat you better.
- Or when she's a screaming teenage nightmare you can read it again and remember why you love her.
- Or, when she gets married, you can make a gift of it to her - something old maybe?
- Or, while she's pregnant with her first baby, you can give her this one, and make one for your soon to be grand baby and give her that after the arrival.
Sunday, January 1, 2012
A 12-days special I couldn't resist...
New ribbon organizers! And, only $10 each, Merry Christmas to me!
If you look back at my first post where I showed you my craft room, you can see how my ribbon was displayed above one of my work spaces. The wooden dowels were curved, overloaded, and not all that functional. I'd pull down what I wanted to use and invariably start an avalanche. So when I got the email for this deal from scrapbook.com I bought my limit, got out my dad's whisky stick, my trusty De Walt drill and away we went. Ta da!
Playing on a theme
About a year ago, Hero Arts produced this wood mounted 4-square set of little birds holding Christmas things in their beaks. They've been sitting in my Christmas card idea box since I got them. I saw the "let the choir sing" sentiment stamp and immediately associated it with these little egg shaped birds.
If you've been following along, you know the 4-square card layout is one I use a lot. This time they are all in a row, colored with markers, and placed on a background from K&Co. I used another of the Tim Holtz edge dies to add a little something extra and his frosted spruce (or pine, maybe?) distress ink to smear things up a bit. That's one of his Christmas special edition colors this year.
The choir from the sentiment is, of course, meant to be angels. But since I am way too secular to own any angel stamps, I picked the best part of an angel to bring the idea forward. The little birds make their appearance on the inside of the card. The wings are from WRMK, stamped using Dove Grey Staz-On onto white card stock. I cut them out and applied them with hot glue. I love hot glue. I'm using it more and more. Especially on cards that I know will be in the shoebox for a while. Tombow is still my tape runner of choice, but nothing stays stuck over time like good ol' hot glue.
Happy New Year! - AMK
Sunday, December 25, 2011
Majors and Minors - using it all up
I'm getting a head start on next Christmas while I'm still in the mood. If you're a card-maker like me you know all about having a pile of scraps to deal with. It's almost never that a single card idea uses up all the paper you've chosen. The idea you have in your head becomes the Major. The challenge becomes how you adapt that idea to use up the scraps, creating the Minor.
Here is a sample of one of my Majors and Minors. It's a reoccurring theme for me. There is a rendition of "T'was the Night Before Christmas" on my all time favorite Christmas album by Fred Waring and the Pennsylvanians that I hear in my head all season long. Inevitably it results in the sugar plumb card.
The larger one - the Major - was my original design idea, 5x7. The background paper is from Pink Paislee's snow day collection. I had been hanging onto a pack of felt snowflakes from American Crafts for forever and decided it was time to use them up. I added glitter brads and stamped images along with punched out rings to create the 'visions of sugar plumbs that danced in their wee, little heads.' The header image is from Unity Stamps - an image by Webster's Pages. I may color it, but have plenty of time to decide. Everything is embossed with clear powder to make the edges shine and the stamped images glossy. It adds to the 'sugar' feel I was trying to create. Some images are popped up with foam to add dimension.
Since I used up all the glitter brads on the Major, I substituted crystal bling on the Minor. The ribbon is American Crafts, again, and has the same color scheme as the background paper. I reversed the paper for the Minor just to mix things up. I think I'll get out my glitter glue and glitter up some of those dots in the background, just to keep the 'sugar' idea prevalent in both.
Happy Christmas, Everyone! - AMK
Saturday, December 17, 2011
So the Wise Men don't get here until January, right?
Hand made Christmas cards. Let's face it, Christmas cards are a paper crafter's wet dream. We love making them. Look at me, it's after midnight and I'm blogging about making them. Of course I should be ACTUALLY making them, but I tried and kept making a mess so I must be tired.
I need 47 in total to send. So, yeah...I may have to invoke the "Wise Men" rule this year.
As I recall my Catholic upbringing, the nuns made a big deal about the Wise Men finally showing up sometime in January. I think it's the 6th? The Feast of the Nativity, or Epiphany or some such thing as that? Somebody help a bad Catholic out here on the date, please?
At any rate, the "Wise Men" rule CLEARLY states that if you get your Christmas cards in the mail before they show up to the Nativity Party, you are not late. Keep that in mind, y'all....
So far it's been a Crafty Brown Christmas here in the Burg. I cannot tell you exactly why I am digging this stuff, but I am. I used to just have the plain stuff and that in itself was fun, but now they started printing on it. How cool is that?
The one with Prancer on it and his chorus line is a bit of a repeat of one I did for the store a couple years ago. I never made it for Christmas delivery, just the store sample. Same goes for the little white fox. You can't outfox Santa! Hah!
The final one is also a remake of one I did even longer ago. I like the idea of the calendar with the pin in it. The pin is new to the design this go around (does it look like a push pin?), and I switched out the Santa image for one with more fur on his costume so I could use my liquid applique to puff it up. That stuff is cool. You need to get some.
Oh - and how about those eyelets? Come on, admit it. You have THOUSANDS of those things and you quit using them because they fell out of vogue in the paper crafting world. Well everything old is new again, apparently. Get on board...
All cards are A2. Any questions about any of the products used - shout them out. Happy Christmas! - AMK
Thursday, December 15, 2011
The 2011 Cookie Book Reveal
Ta Da! The annual cookie exchange took place last weekend and was yet another fun time with friends. To all those of you brave enough to participate, THANK YOU!
The book this year had a jacket that you slide off to reveal the embossed metal cover. Then you open to reveal the pocket pages where the recipes are all tucked inside each pocket. Page numbers and an index tells you who made what recipe. Some books were red and some green, the letters and numbers and pages were all different for all the books so everyone gets something just a little bit unique.
Colleen took pictures, so shortly there will be photos to add to the book. Because, what's a cookbook without pictures, right? Happy Christmas everybody! - AMK
Subscribe to:
Posts (Atom)