About a year ago, Hero Arts produced this wood mounted 4-square set of little birds holding Christmas things in their beaks. They've been sitting in my Christmas card idea box since I got them. I saw the "let the choir sing" sentiment stamp and immediately associated it with these little egg shaped birds.
If you've been following along, you know the 4-square card layout is one I use a lot. This time they are all in a row, colored with markers, and placed on a background from K&Co. I used another of the Tim Holtz edge dies to add a little something extra and his frosted spruce (or pine, maybe?) distress ink to smear things up a bit. That's one of his Christmas special edition colors this year.
The choir from the sentiment is, of course, meant to be angels. But since I am way too secular to own any angel stamps, I picked the best part of an angel to bring the idea forward. The little birds make their appearance on the inside of the card. The wings are from WRMK, stamped using Dove Grey Staz-On onto white card stock. I cut them out and applied them with hot glue. I love hot glue. I'm using it more and more. Especially on cards that I know will be in the shoebox for a while. Tombow is still my tape runner of choice, but nothing stays stuck over time like good ol' hot glue.
Happy New Year! - AMK
Showing posts with label Staz-On. Show all posts
Sunday, January 1, 2012
Sunday, September 25, 2011
Coolest of Cats Card Class - Mini
In response to Andrea who lamented not having any of the products from the previous card class, I created this card with an eye for easy substitution. It's a mini class, which is my way of saying the construction of the thing is pretty straight-forward.
Hey - how about this? If you send me a pic of your version of this card, I'll post it here for everyone to see. amking1964@gmail.com will get it to me. It will be fun to see your interpretation of it.
First - here is a picture of the supplies I used:
Background paper - Reminisce, Midnight Stripe (I bet the designer has a cat named Midnight)
Cat Stamps - These are two images from a company called Prickly Pear. I picked up these little guys at the One of a Kind Rubber Stamp and Scrapbook show in Madison last year. The Saturday before Thanksgiving, folks. Mark your calendars.
Circles Stamp - that's Tim Holtz, he's got an embossing folder that matches it if you really dig it.
Embossing Powder - ZING by American Crafts - Orange, this stuff is glittered. (Andrea's favorite medium)
Staz-On - Jet Black
Sentiment - sorry - the manufacturer is not labeled on this one, it's really easy to use your printer though, (wink, wink!)
Orange Brads - these two here are swirl brads in two colors of orange. They came in a glass tube that was prone to rolling off the table and breaking on the floor, hence I don't have the original packaging to tell you who made them.
Hey - how about this? If you send me a pic of your version of this card, I'll post it here for everyone to see. amking1964@gmail.com will get it to me. It will be fun to see your interpretation of it.
First - here is a picture of the supplies I used:
Background paper - Reminisce, Midnight Stripe (I bet the designer has a cat named Midnight)
Cat Stamps - These are two images from a company called Prickly Pear. I picked up these little guys at the One of a Kind Rubber Stamp and Scrapbook show in Madison last year. The Saturday before Thanksgiving, folks. Mark your calendars.
Circles Stamp - that's Tim Holtz, he's got an embossing folder that matches it if you really dig it.
Embossing Powder - ZING by American Crafts - Orange, this stuff is glittered. (Andrea's favorite medium)
Staz-On - Jet Black
Sentiment - sorry - the manufacturer is not labeled on this one, it's really easy to use your printer though, (wink, wink!)
Orange Brads - these two here are swirl brads in two colors of orange. They came in a glass tube that was prone to rolling off the table and breaking on the floor, hence I don't have the original packaging to tell you who made them.
The finished card is #10, that's 4x9.25. It will fit nicely into a #10 business envelope. Take your supplies and work your magic and make them look like what you see below. Note that I stamped two sets of circles, embossed them and then cut them out. Stamp everything on the scraps from your cream colored card stock.
When you're all done putting it together, it should look something like this. That's it. Like I said, a mini card class.
Let me know what you think and send me your versions! Enjoy - AMK
Saturday, September 24, 2011
Halloween Card Class - a rainy afternoon project
It's Saturday here in Cedarburg and man, is it raining. Dennis Diebold must have washed is wife Lynn's car again...He tells me that's the surest way to make it rain. To while away the afternoon I put this little card together. It's one of those piles you saw on the floor in a previous Halloween post. Hopefully the pictures will make things clear.
First - we have to give credit where credit is due: Here are the tools you'll need:
Sizzix Strip Die - Bats;
EK Success punch - Drops;
Sizzix Tim Holtz Alterations embossing folder - Halloween Words;
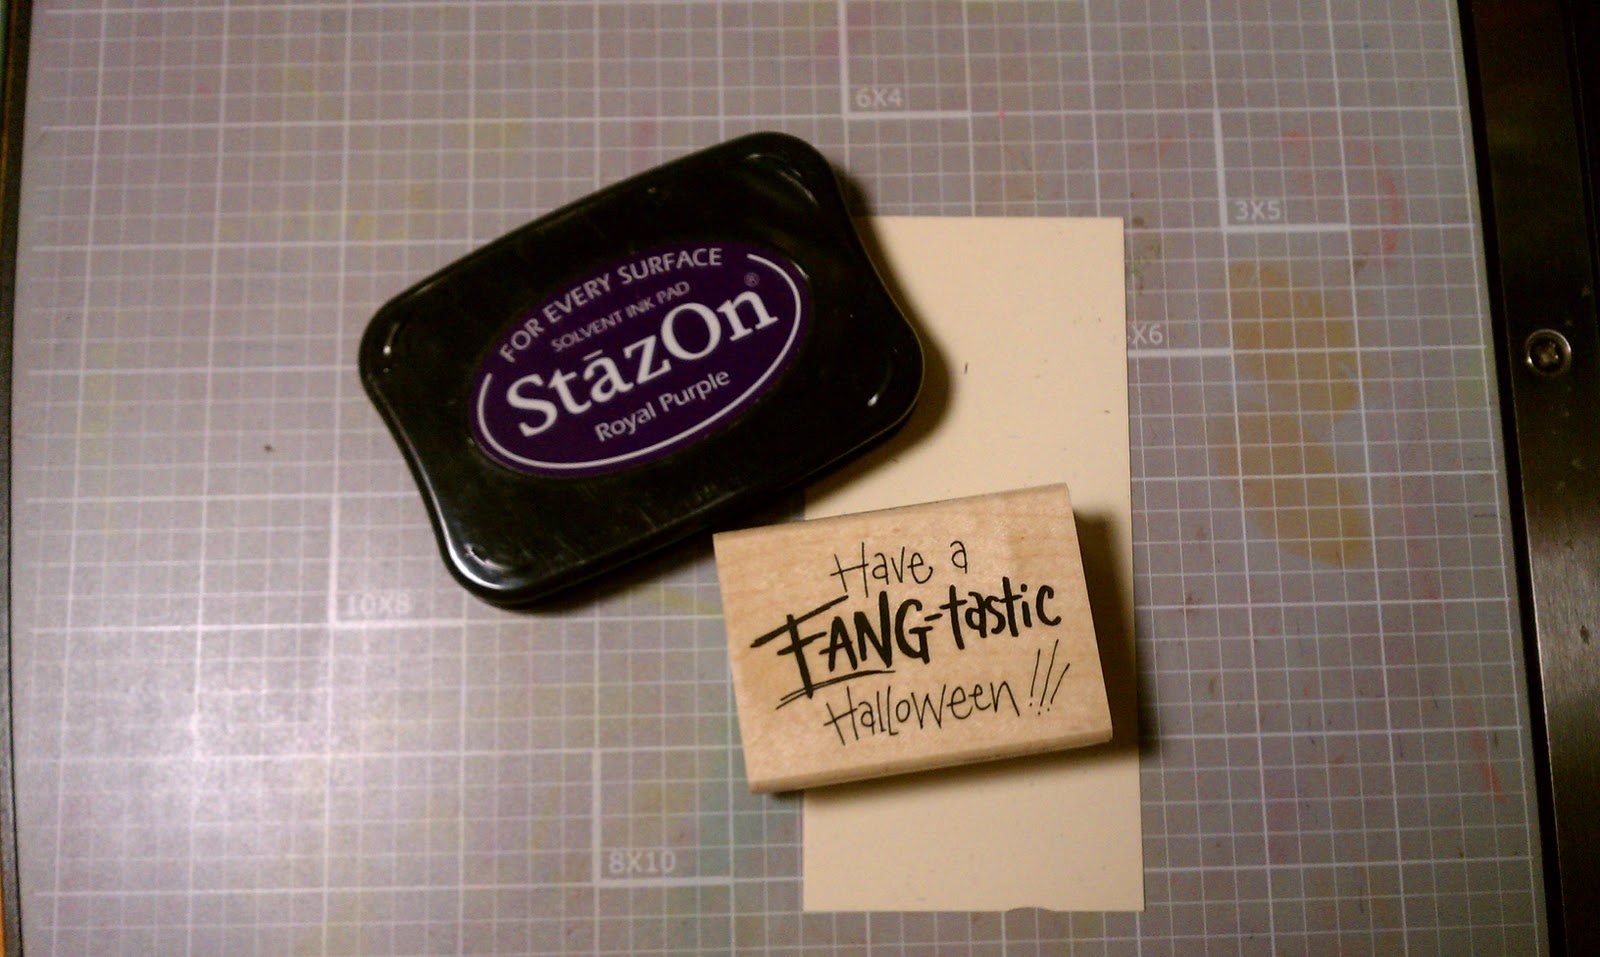
Stampendous H258 - Fang-tastic
Staz-On - Royal Purple
Versa Mark - Grape (not pictured)
Colorbox Re-Inker - Lava Black (not pictured)
Small rubber brayer
Pallet board
Background paper is from Cosmo Crickit, Haunted collection - Macabre
Transparency Film
White, beige, orange, purple, black card stock scraps
Die Cutting Machine - I use the Big Shot. It's my workhorse.
The finished card is A7 - that's 5x7. The embossing folder is A2 - that's 4.25 x 5.5. So trim your papers accordingly.
Ok - Let's get started. If you click on the finished card to embiggen it, you will see the transparency overlay over the words. This adds to the interest of the card and makes people say - 'How'd you do that?'
Well - here's how:
Cut your transparency film to fit the folder. There are two definate sides to this stuff. The rough side is meant to take the ink. So always use that side down.
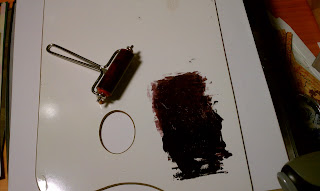
Dribble a little Lava Black ink onto a pallet board and roll it around with the brayer until you get a nice even smudge.
Open the embossing folder and roll the ink onto the back panel with the brayer. Don't think to much about this or you will go crazy. You are working with a transparency and that means everything is in reverse. Lay the film inside the folder with the rough side down and roll it through your die cutting machine.
Next, cut a piece of white card stock the same size as the transparency, lay it into the emobssing folder and run it through. Don't worry about cleaning the folder. The ink, remember, will be on the back side of the white card stock, so you won't see it.
Load the brayer with ink again, and roll it onto the front of the white embossed card.
Layer the transparency over the card stock and attach using a few strategically placed mini-glue dots.
Ink the stamp with royal purple and stamp onto beige card stock scrap, trim close to image, edge with grape ink, and matt with first orange and then purple. Don't use white for this image. You want those fangs to pop, so they should be the only white element to the card.
Ok - if your hands are not clean, go wash them. We want these fangs to be a nice bright white. I had to toss my first set because my fingers were full of ink. Punch out two sets of the fangs using the Drops punch. Make sure your paper does not have an obvious texture as that's usually only on one side. You'll be turning one of the sets over to get the shapes you need for this.
Die cut one of the smaller bats from the strip die using a black scrap. Now you have all your pieces, so let's assemble the card.
I liked the background paper so wanted to show more of it rather than less. Attach the embossed panel to the card as shown and trim off the pieces that don't fit on the front. Layer on the stamped image. Pop up the fangs and the bat with some foam squares. Ink the outer edge of the card with grape ink. Stay away from the transparency with the grape. The front of the transparency will not take the ink and you'll just get it all over your fingers. If you want to add a purple edge to the transparency, you'll have to do it with the Staz-On.
That's It! Hope this was all clear. If you get confused, post a commnt. I'll respond in kind.
Enjoy! - AMK
First - we have to give credit where credit is due: Here are the tools you'll need:
Sizzix Strip Die - Bats;
EK Success punch - Drops;
Sizzix Tim Holtz Alterations embossing folder - Halloween Words;
Stampendous H258 - Fang-tastic
Staz-On - Royal Purple
Versa Mark - Grape (not pictured)
Colorbox Re-Inker - Lava Black (not pictured)
Small rubber brayer
Pallet board
Background paper is from Cosmo Crickit, Haunted collection - Macabre
Transparency Film
White, beige, orange, purple, black card stock scraps
Die Cutting Machine - I use the Big Shot. It's my workhorse.
Ok - Let's get started. If you click on the finished card to embiggen it, you will see the transparency overlay over the words. This adds to the interest of the card and makes people say - 'How'd you do that?'
Well - here's how:
Cut your transparency film to fit the folder. There are two definate sides to this stuff. The rough side is meant to take the ink. So always use that side down.
Dribble a little Lava Black ink onto a pallet board and roll it around with the brayer until you get a nice even smudge.

Load the brayer with ink again, and roll it onto the front of the white embossed card.
Layer the transparency over the card stock and attach using a few strategically placed mini-glue dots.
Ink the stamp with royal purple and stamp onto beige card stock scrap, trim close to image, edge with grape ink, and matt with first orange and then purple. Don't use white for this image. You want those fangs to pop, so they should be the only white element to the card.
Ok - if your hands are not clean, go wash them. We want these fangs to be a nice bright white. I had to toss my first set because my fingers were full of ink. Punch out two sets of the fangs using the Drops punch. Make sure your paper does not have an obvious texture as that's usually only on one side. You'll be turning one of the sets over to get the shapes you need for this.
Die cut one of the smaller bats from the strip die using a black scrap. Now you have all your pieces, so let's assemble the card.
I liked the background paper so wanted to show more of it rather than less. Attach the embossed panel to the card as shown and trim off the pieces that don't fit on the front. Layer on the stamped image. Pop up the fangs and the bat with some foam squares. Ink the outer edge of the card with grape ink. Stay away from the transparency with the grape. The front of the transparency will not take the ink and you'll just get it all over your fingers. If you want to add a purple edge to the transparency, you'll have to do it with the Staz-On.
That's It! Hope this was all clear. If you get confused, post a commnt. I'll respond in kind.
Enjoy! - AMK
Subscribe to:
Posts (Atom)